Do you want to implement Google Analytics via Google Tag Manager, but you lack the (technical) skills required? No worries, I have written this 20 steps guide to help you out.
Google Tag Manager can be daunting at first. Tags, triggers, variables… yeah, I hear you thinking. After reading this guide you know exactly where to start.

I was inspired to write this post by LunaMetrics, one of the top Analytics agencies in the world.
In this step-by-step tutorial I will explain in detail how you can set up the GTM basics in record time. I will use my “Marathon Training” website as an example here.
Step 1: Set up Google Tag Manager Account
I recommend you to use your Google Analytics account login for setting up your Google Tag Manager account.
Log in to your Google (Analytics) account and navigate to this URL.
Step 2a: Setup Account
Fill in your Account Name and it’s up to you whether you like to share data anonymously with Google or not.
![Add a New Account]() Step 2b: Setup Container
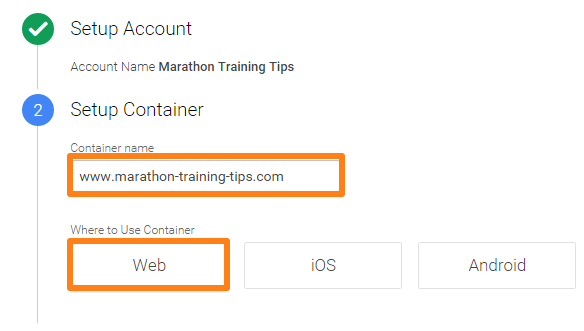
Step 2b: Setup Container
 Step 2b: Setup Container
Fill in your Container name and select web (if you own a website like me). You can change the name settings later if you make a mistake here.
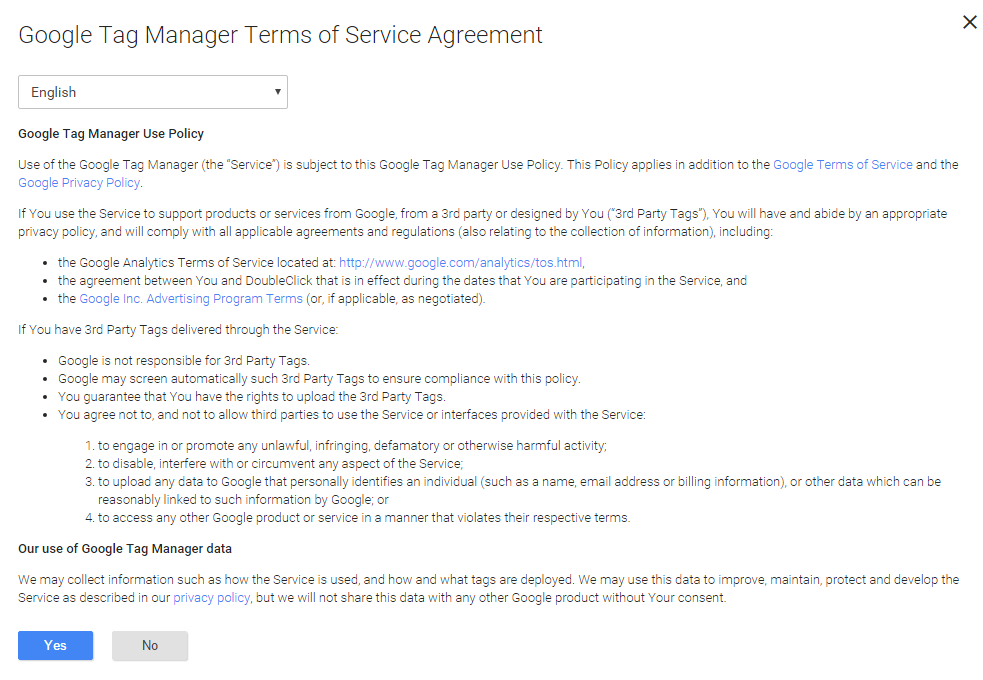
Step 3: Accept GTM Terms of Service Agreement
Read through the service agreement and accept the terms and conditions.
Step 4: Install Google Tag Manager
Copy the code below and paste it onto every page of your website. Preferably immediately after the opening <body> tag.
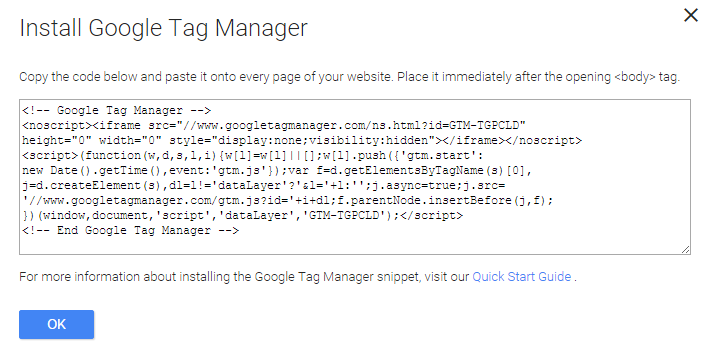 Read this quick start guide if you have problems with installing the code.
Step 5: Review Your Account
After you have hit “OK” you will land on this page:
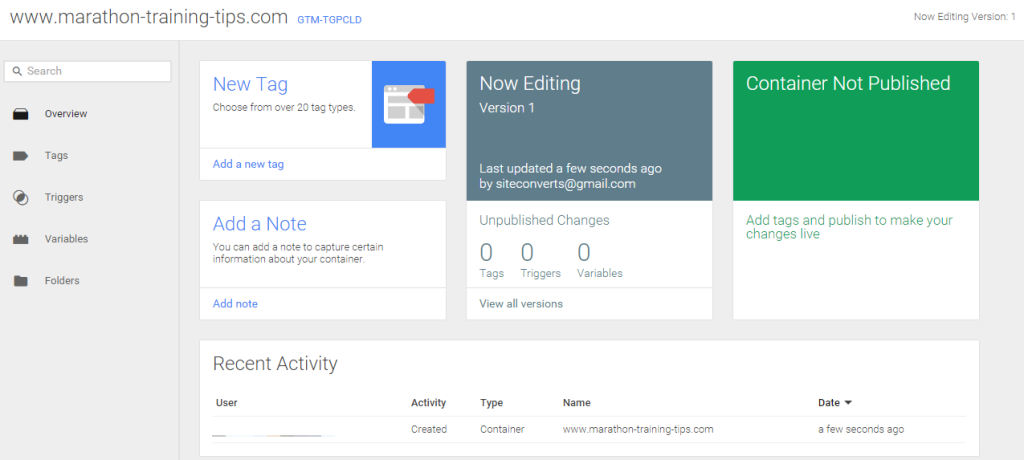
You just have created one account with one empty container. In order to get things rolling, you need to manually set up tags, triggers and variables, or…
Yes, there is a great solution. You can important a predefined container from our friends at LunaMetrics (!).
Step 6: Navigate to LunaMetrics.com
LunaMetrics has done a tremendous job by providing this GA Complete Pack for GTM.
The GA Complete Pack includes recipes to help setup and enhance your Google Analytics implementation, including some of their more advanced plugins.
- Basic Pageview Tracking
- File Download Tracking
- Contact Link Click Tracking
- Outbound Link Click Tracking
- YouTube Tracking
- Scroll Tracking
- Cookie Management Tools
- AJAX Listener
And no worries, I have tested it on multiple websites.
Step 7: Download GTM Container
In the top right section of the page is a “Download Container” link: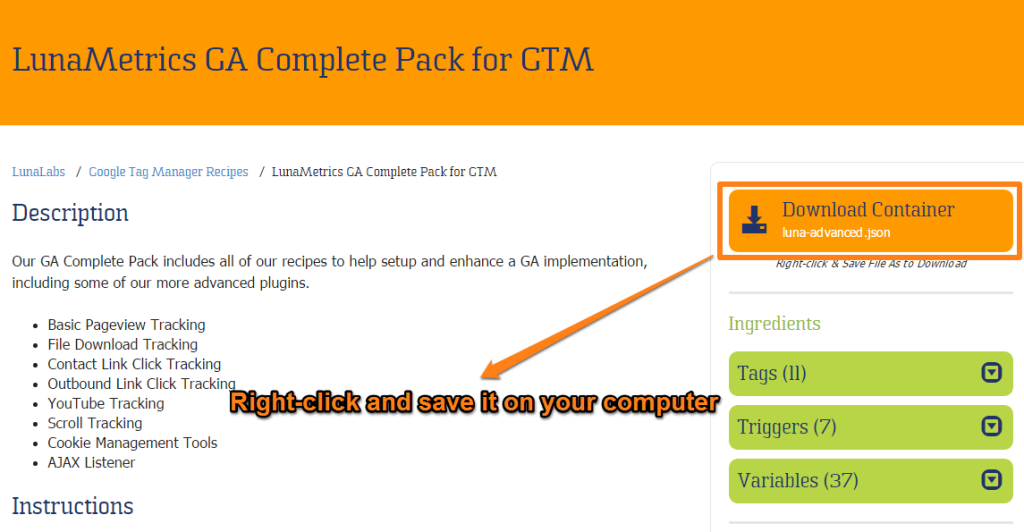 Make sure to save it (JSON file) on your computer.
Step 8: Navigate to Admin Section of GTM Account
Now it’s time to import the container in GTM.
First you need to go to the admin section of your GTM account.
![Admin GTM account]() Step 9: Click on “Import Container” Link
Step 9: Click on “Import Container” Link
 Step 9: Click on “Import Container” Link
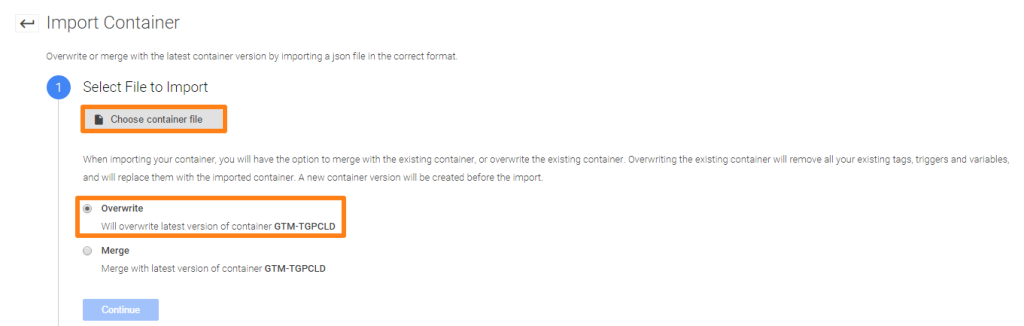
![Import container link GTM]() Step 10: Upload JSON File
Step 10: Upload JSON File
 Step 10: Upload JSON File
You can now upload the JSON file (luna-advanced.json) into your GTM account.
Step 11: Preview and Confirm Import
Before the container is imported in Google Tag Manager, you need to preview and confirm the upload.
![Preview and confirm import]() Step 12: Review Container
Step 12: Review Container
 Step 12: Review Container
Take a look at “Recent Activity” to confirm the import has succeeded:
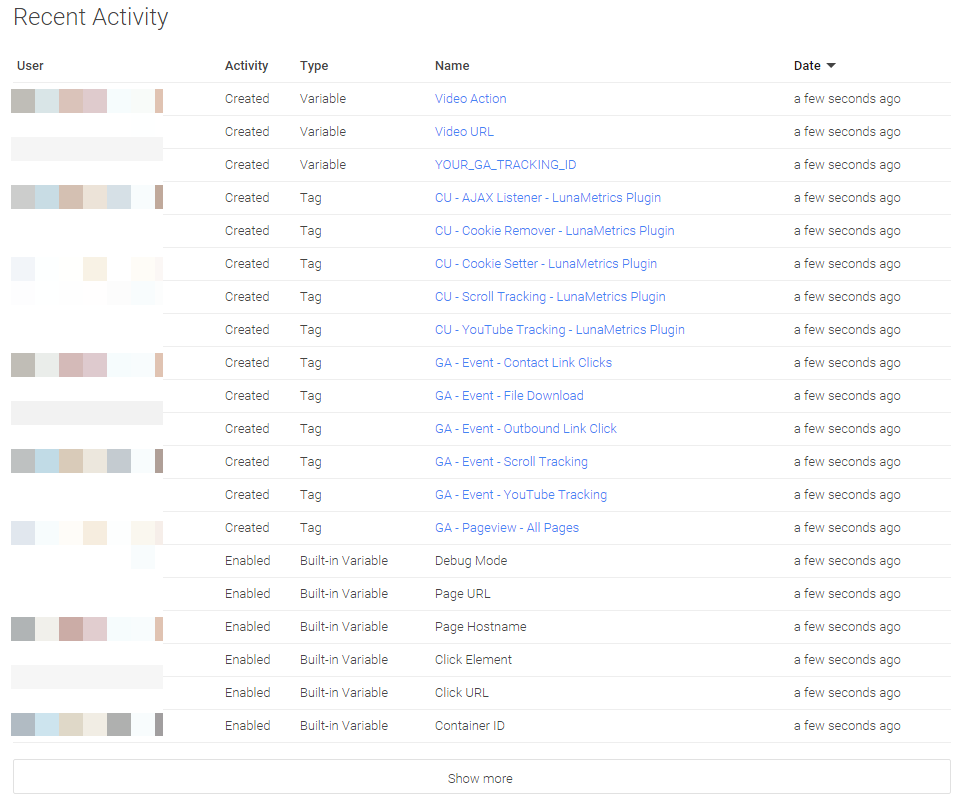 The imported file helps you to easily measure core interactions in Google Analytics.
Step 13: Create a GTM (Test) Property in Google Analytics
I recommend to set up a temporary new property in Google Analytics first instead of simply removing your current Google Analytics script.
It doesn’t matter whether you have already deployed Classic or Universal Analytics. You simply don’t want to mess things up!
By doing this you can:
- Test whether your GTM set up works correctly
- Compare the data of the two properties
Simply click on “Create new property” link and you can easily set up your test property:
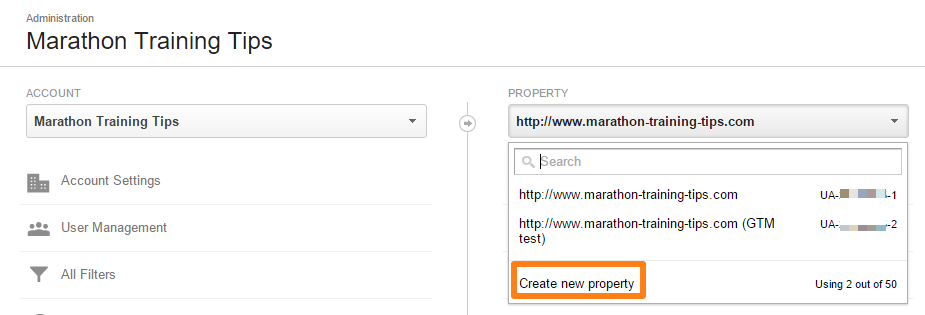 You are allowed to create 50 properties in one account. In this case it is my second property and reads “UA-XXXXXXXX-2.
Step 14: Change Variable in GTM
There is one variable in GTM that you need to change to get this to work. It’s a user-defined variable.
You can find it in the variables list, named: YOUR_GA_TRACKING_ID.
Change “UA-XXXXXX-YY” into the tracking id of your new created property.
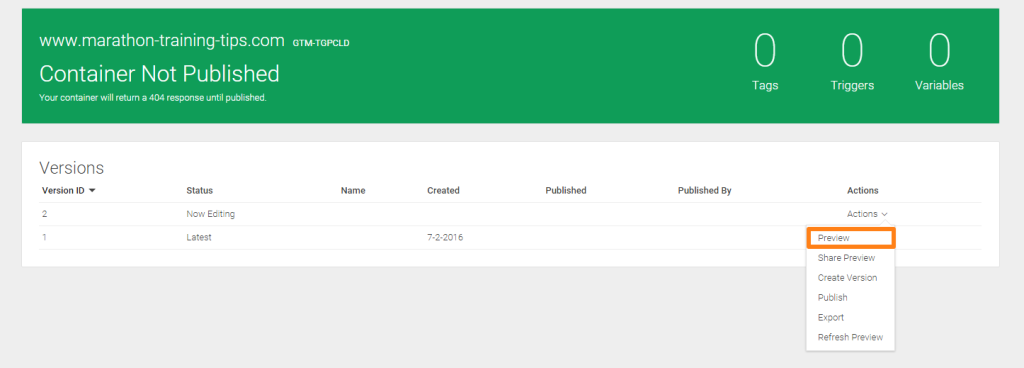
![Change and save variable]() Step 15: Preview Container
Step 15: Preview Container
 Step 15: Preview Container
In the “Versions” section click on “Preview” latest version (probably version 2).
Step 16: Refresh Your Website
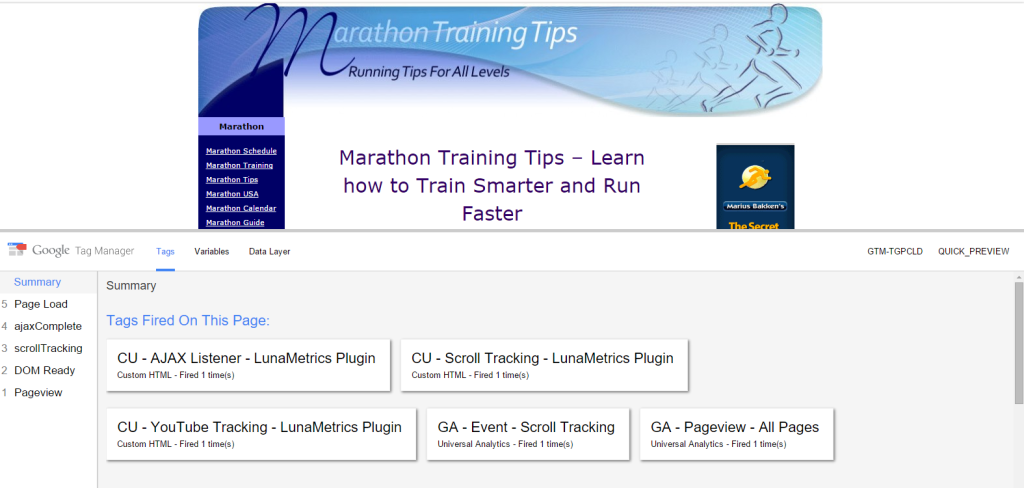 Yeah, a lots of tags are fired on this page. It looks good!
Step 17: Publish Container
It’s time to publish the container if everything looks good.
Step 1:
 Step 2:
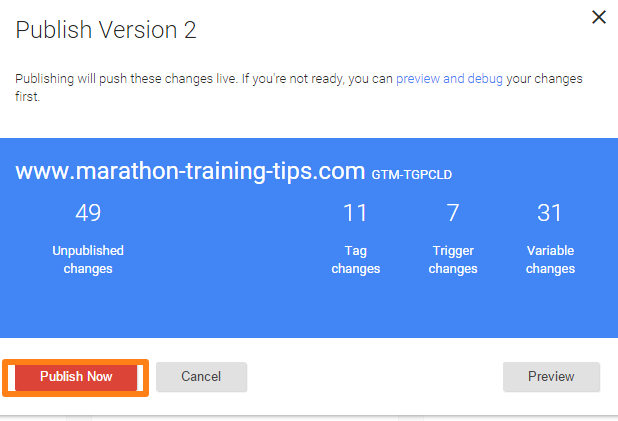 Make sure to leave preview mode in the container section.
Step 18: Use Real-Time Analytics for Final Check
I have just visited this page: http://www.marathon-training-tips.com/marathon-training-schedule.html.
Let’s check Google Analytics now:
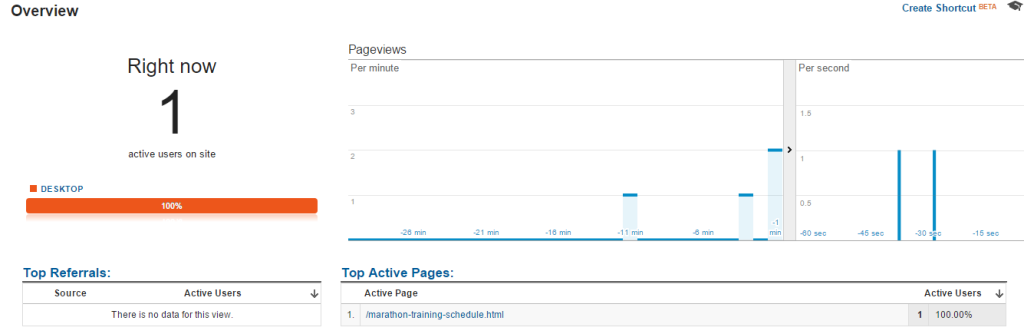
Note: make sure not to exclude your IP address in the GTM test property/view if you want to verify your data with real-time reports in Google Analytics.
Helpful guides:
Step 19: Compare Data of Both Properties
From now on you have your “old” property (UA-XXXXXXXX-1) collecting data and your fresh, new GTM property (UA-XXXXXXXX-2) collecting data as well.
I recommend to wait a few days to see your data coming in properly.
The numbers might deviate a bit, that’s normal!
Step 20: Change Tracking ID in GTM
Let’s assume you are satisfied with everything.
There are two last things you need to do:
- Change UA number “-2” to “-1” in Google Tag Manager (please see step 14).
- Remove your current hardcoded script(s).
You made it, congratulations!
Bonus
In the beginning of this article I mentioned all the great stuff this plugin can do for you. A short recap:
- Basic Pageview Tracking
- File Download Tracking
- Contact Link Click Tracking
- Outbound Link Click Tracking
- YouTube Tracking
- Scrolltracking
You might want to set up a few new goals that are in line with your business and the (probably) new things you are measuring now.
Note: this is not a complete Google Tag Manager installation. There might be a few things you need to track additionally. It just gives you a head start!
Well, this is it for now. I hope this guide helps you to implement Google Analytics and Google Tag Manager in a smart way!
Of course there are many more things you can do with Google Tag Manager. But that is something for another time!
Do you already use Google Tag Manager and are you happy with it? Not yet using it, but inspired to consider switching to GTM? I am happy to hear your thoughts!
I am sure you will love my new eBook if you enjoyed reading this article!It contains 100 actionable tips to grow your online business.
Analytics & Optimization Tips eBook and Free Updates
 (Your email address is 100% safe with us)
The post How to Implement Google Analytics via Google Tag Manager in Record Time appeared first on OnlineMetrics.