Technical issues, marketing campaigns that are underperforming, huge spikes in traffic numbers. Custom alerts can be a great help to monitor and act on these big changes.
In Google Analytics I use annotations to place context around the data that is collected.
On the other hand, custom alerts help me to automatically monitor important changes in my clients’ accounts. And you certainly don’t want to do this all manually!Image may be NSFW.
Clik here to view.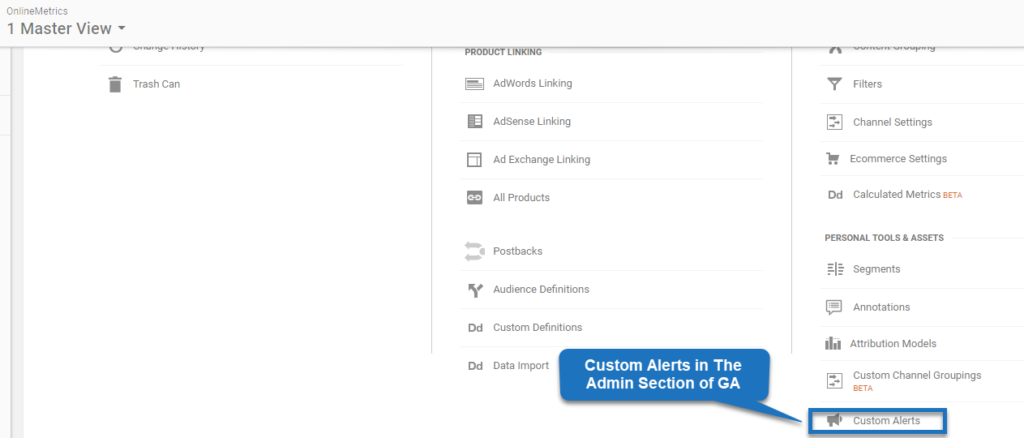
This post explores the concept of setting up custom alerts, reveals how it works and provides some general guidelines that are useful for all of you.
Table of Contents
- How Custom Alerts Work
- How to Set Them Up
- Naming Conventions
- Five Examples to Get Started
- Alternative Tools
Let’s dive right in!
How Custom Alerts Work
Custom alerts are set up at the view level of your Google Analytics account.
They trigger an email alert when the alert condition is met. It is even possible to set up mobile phone triggers (United States only).
It’s up to you whether you set them up just for yourself or share them with your team or client.
Usually you will receive the alert message one day after the alert was triggered.
Image may be NSFW.
Clik here to view.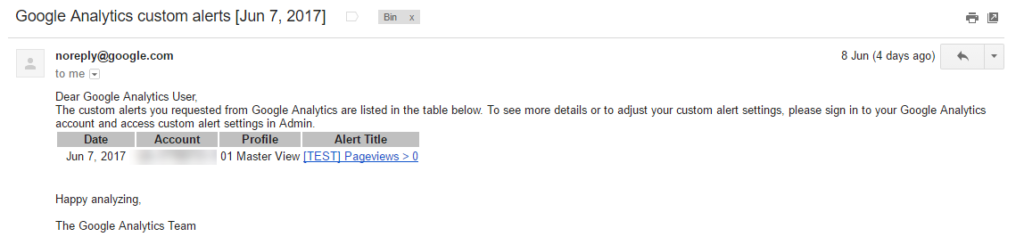 The great thing here is that you will receive one email with all the individual alerts that are triggered in your Google Analytics accounts.
You can click on the “Alert Title” to immediately navigate to the details of the alert (make sure you are logged into Google Analytics).
How to Set Them Up
Here are five steps to set up your Google Analytics custom alert.
Step 1: sign in and navigate to your Google Analytics view.
Step 2: click on “custom alerts” under Personal Tools & Assets.Image may be NSFW.
Clik here to view.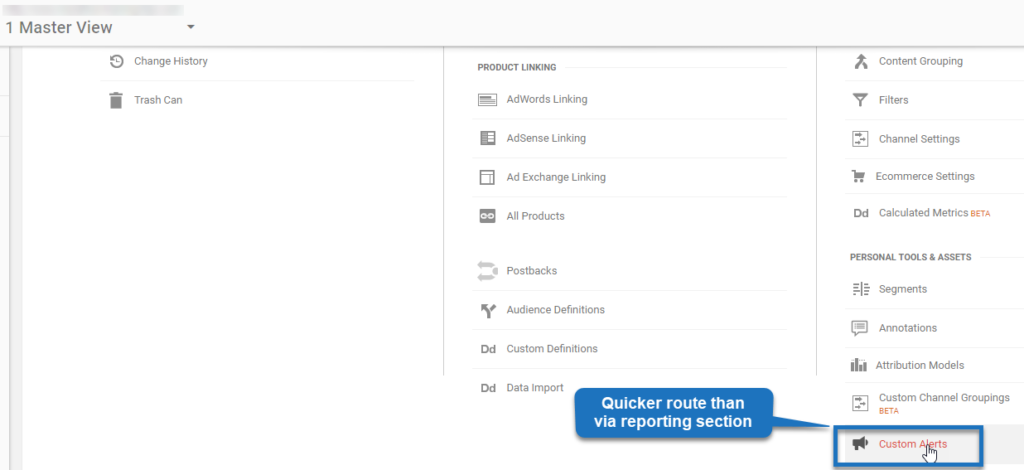 Step 3: click on “New Alert”.
Step 4: fill in custom alert details.Image may be NSFW.
Clik here to view.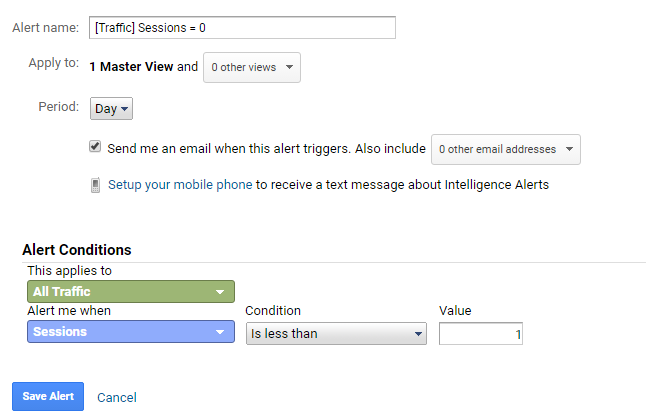 If desired, you can set up your custom alert in multiple Google Analytics views.
Step 5: Save your new alert and you are good to go!
Image may be NSFW.
Clik here to view.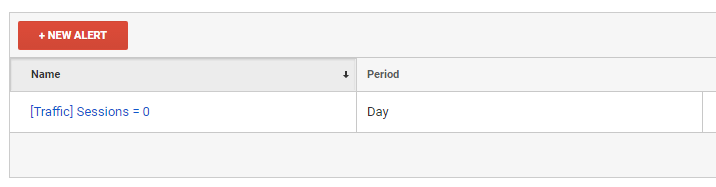 Deleting custom alerts is easy and can be done via “Manage custom alerts”. In this overview you can choose which custom alerts to keep and which ones to delete.
Best Practices
- Set up daily, weekly and monthly alerts to keep track of perfomance changes on different intervals.
- Set up daily alerts for urgent matters.
- Come up with a top list of custom alerts that are suitable for multiple views/accounts. This is especially useful if you work as a consultant and are hired by multiple clients.
- Share your custom alerts (via email function) with others as well.
- Set up segmented custom alerts for in-depth/audience monitoring.
Naming Conventions
I have explained a lot about the importance of naming conventions in other articles.
This is incredibly useful for annotations, events, custom campaigns, but also for your custom alerts.
I love to use brackets [] for all my naming conventions as they will create a logical order.
Here is an example of the structure I put in place for one of my clients:
Image may be NSFW.
Clik here to view.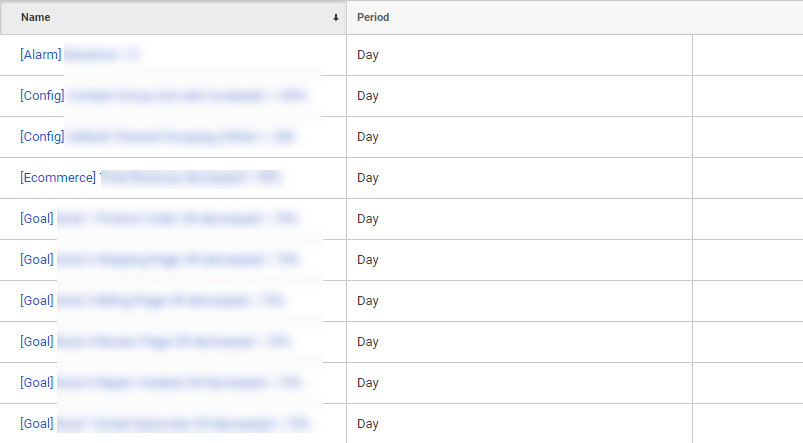 Above you can see an overview of 10 daily custom alerts.
They are grouped into four different categories:
- [Alarm] – most critical alert for this organization.
- [Config] – custom alerts that are related to required configuration changes.
- [Ecommerce] – alert that is related to the Ecommerce setup.
- [Goal] – alert that is related to the Google Analytics goals setup.
It’s up to you how you define your alert categories, but I strongly recommend to work with at least three to five categories.
The “Alert Title” is shown in the email that is send to you so it is very helpful if the description is clear for everyone who receives the message.
Five Examples to Get Started
In this chapter I will show you five different daily custom alert types that are very useful to set up.
1. [Alarm] Sessions = 0
This is a crucial alert to configure as when your sessions drop to zero on one day, you have a serious problem.
Image may be NSFW.
Clik here to view.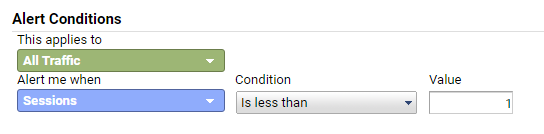 For this alert I wouldn’t recommend to only rely on the custom alerts feature in Google Analytics.
In the last part of this article I will offer some additional suggestions for monitoring the uptime of your website.
2. [Config] Content Group (not set) increased > 100%
Setting up content groupings is highly recommended no matter the type of business you are in. It helps you to better analyze and optimize your content performance.
The first step in getting this custom alert to work, is to set up a segment for content group exactly matches (not set).Image may be NSFW.
Clik here to view.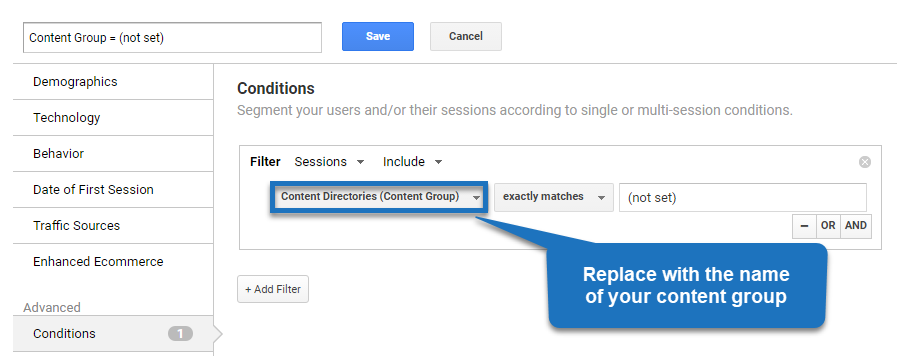
And now you are able to configure a segmented custom alert in Google Analytics.Image may be NSFW.
Clik here to view. It’s up to you what percentage you want to use here. As I want to keep this site-wide content grouping as clean as possible – where I minimize the (not set) value – I want to be immediately alerted.
This helps me to quickly identify issues and modify the content grouping setup accordingly.
3. [Config] Default Channel Grouping (Other) > 250
Your Google Analytics data can quickly become inaccurate because of data processing rules. The default channel grouping in Google Analytics is extremely useful, but you need to know how it works.
We all want the group (Other) to be as small as possible. This report can easily lose it’s value as shown below:Image may be NSFW.
Clik here to view.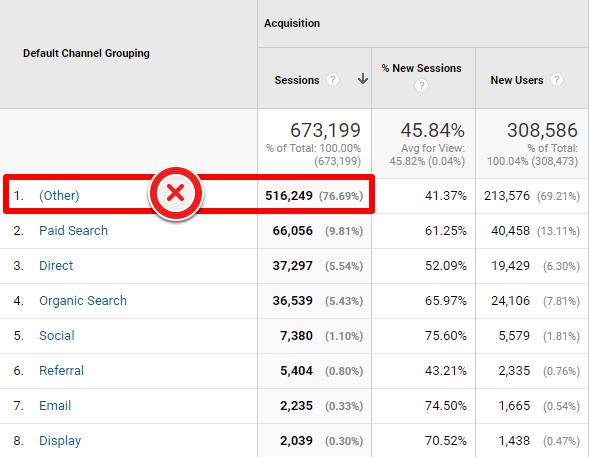
I always like to set strict boundaries when monitoring this segment:
Image may be NSFW.
Clik here to view.
You can easily set up your custom alert after creating this segment.
Image may be NSFW.
Clik here to view.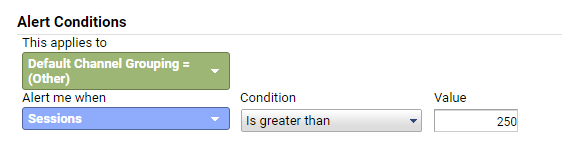 It’s important to set your own boundaries here. At what value (change) do you want to get alerted? It all depends on your business, traffic and monitoring goals.
4. [Ecommerce] Total Revenue decreased > 90%
For ecommerce businesses, one of the important metrics to monitor in Google Analytics is revenue.
There are many different reasons why you want to get alerted when your revenue drops significantly. The following custom alert can be very helpful to set up:
Image may be NSFW.
Clik here to view. In this case I wanted to be alerted on a huge revenue drop. In your case you might want to set the value trigger a bit lower.
Note: if the ecommerce revenue is much lower/higher on weekdays compared to the weekend, you might want to compare to “Same day in the previous week”.
5. [Goal] Goal 1 Product Order CR decreased > 70%
Google Analytics allows you to set up 20 goals in each of your reporting views.
Usually I set up alerts on absolute and/or relative changes in my conversions/goals. One example is shown below:
Image may be NSFW.
Clik here to view.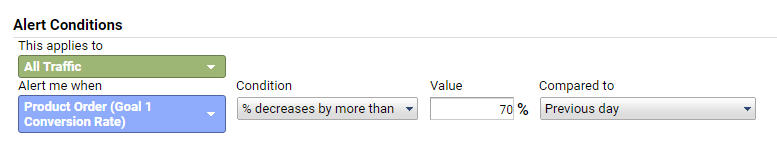 As goals are closely linked to your business’ success, I recommend to set daily alerts for your most important, macro goals.
Based on your business and monitoring needs you can easily expand this list with 50 other custom alerts. Think about adding weekly and monthly alerts. And custom alerts based on a positive outcome (increase) can be very helpful as well.
Alternative Tools
There are many other tools on the market you can use in addition to setting up Google Analytics custom alerts. I will address two of them.
Pingdom
The first custom alert – alert when no sessions are measured on one specific day – is great to set up. However, most businesses want to be immediately alerted when their website might be down.
One of the great tools out there is Pingdom.
Image may be NSFW.
Clik here to view.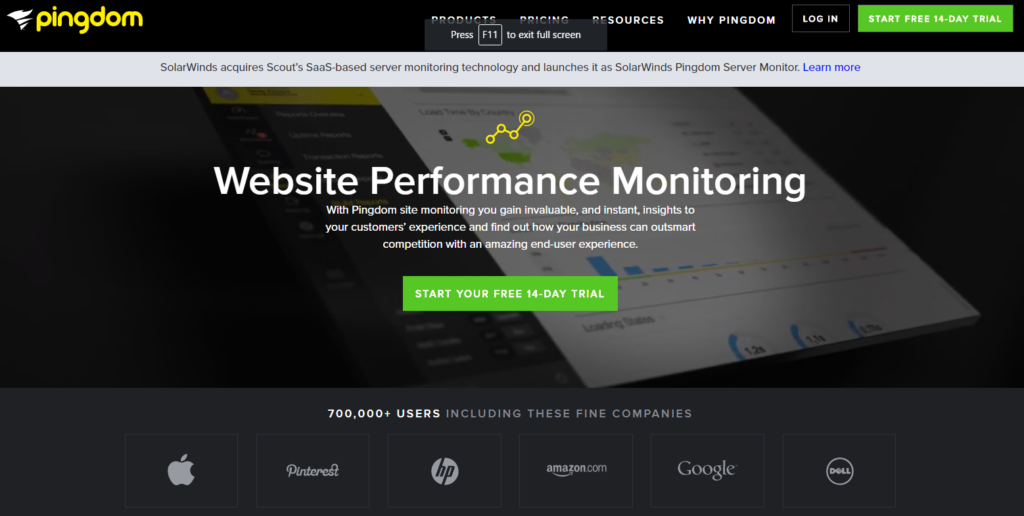
Starting at a rate of less than $ 15 p/month you can monitor your personal website or blog. In addition, the plans for professional websites are really affordable as well.
Give their free 14-day trial a shot if you are interested!
Google Sheets
Google Sheets is really powerful for any marketer or analyst out there.
Understanding the Google Analytics Reporting API is a great first step. This API helps to automatically export Google Analytics data and import it in an external environment/tool.
I have shortly addressed this in my previous post about my favourite Google Analytics tools.
The flexibility and ease of use of Supermetrics comes in handy. You don’t have to master all the technical details of metrics, dimensions and API commandos to work with this tool.
Review the following six (plus two bonus) steps to get up-and-running fast.
Step 1: add the Supermetrics add-on to your Chrome browser.
Image may be NSFW.
Clik here to view.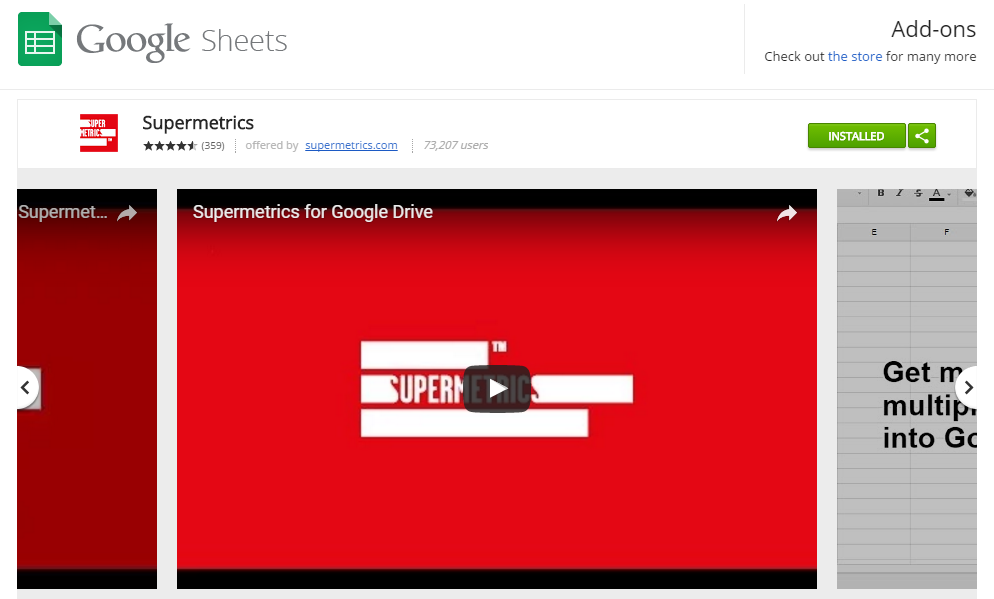 Step 2: write out queries for your “custom alerts”.
Image may be NSFW.
Clik here to view. In the example above I have built a very simple query that automatically imports the sessions of yesterday compared to the day before.
Step 3: use an IF statement to determine whether an alert should be triggered.
Image may be NSFW.
Clik here to view.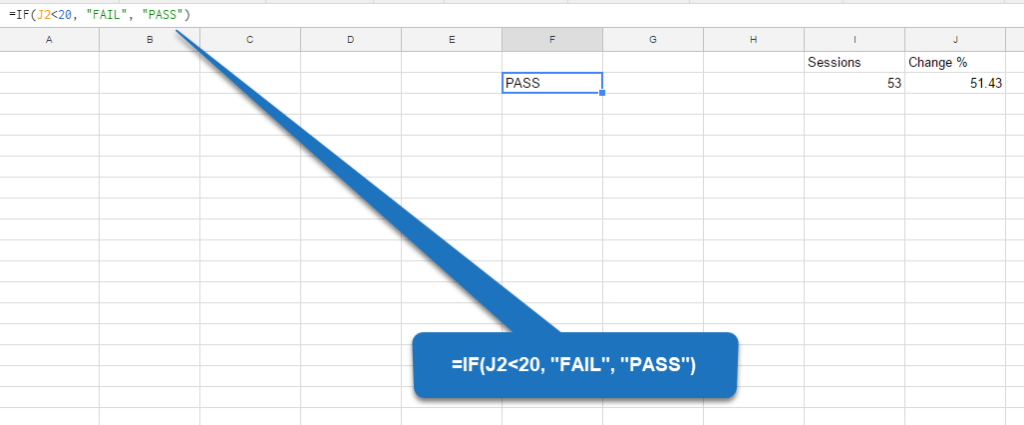 In this case there are two conditions:
- Change % < 20% -> FAIL.
- Change % ≥ 20% -> PASS.
You could use nested IF functions or other formulas to build more complex statements.
Step 4: add conditional formatting rules to your statements.
Image may be NSFW.
Clik here to view.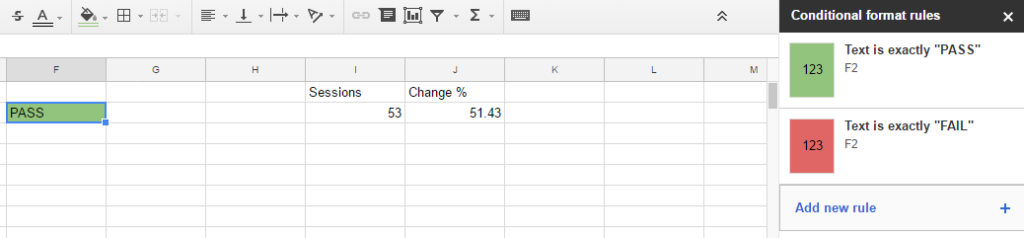 Step 5: build a table and filter on statements that “FAIL”.
This is an optional step, but could help you to concentrate on the items that require action from your side.
Step 6: configure a daily trigger.
To keep things easy – and without technical code – the last step is to set up an automated trigger.Image may be NSFW.
Clik here to view.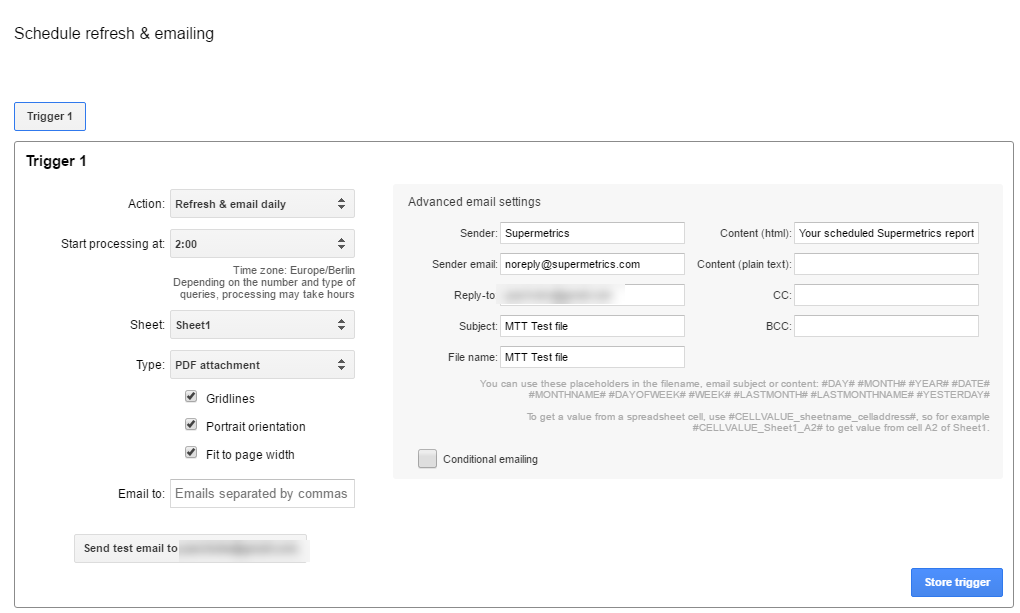
Bonus
I recommend to set it up a bit differently if you want to fully automate it.
As you can see above, there is one setting called “conditional emailing”. You have to use it to set up a condition (whether or not to email) for your alert(s).
Step 7: slightly change the Google Sheet setup.
Image may be NSFW.
Clik here to view. And here is what I have done:
- Changed “IF” formula in: =IF(J2<20, “”, “PASS”).
- Changed conditional formatting for FAIL/red to “Cell is empty”.
- Changed “Change %” to 19 to trigger the alert.
Step 8: set up conditional email.
This is the last step in Supermetrics:
Image may be NSFW.
Clik here to view.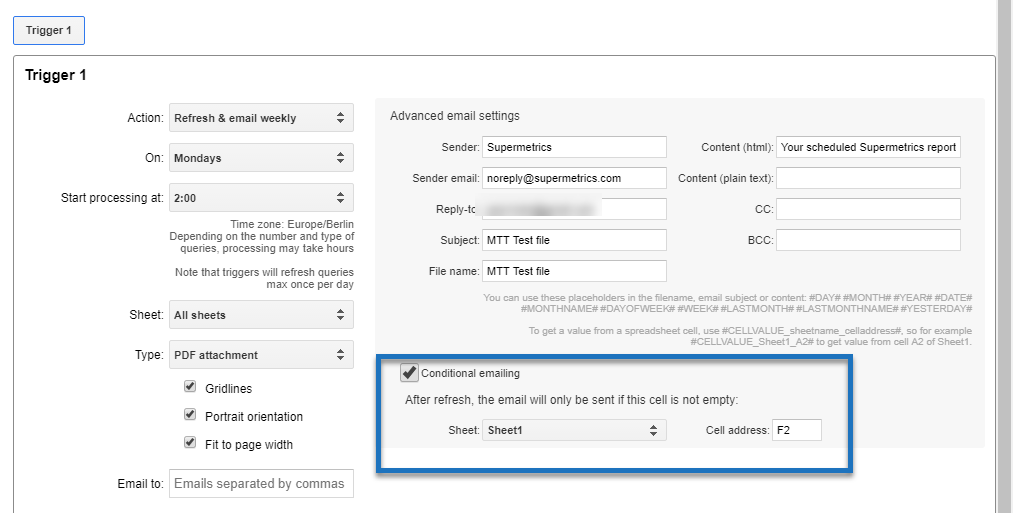
And you are done! Please note that I have used “PDF attachment” as format type to send the email.
You can change it to “html table” if you like.
This is what it looks like (unformatted):
Image may be NSFW.
Clik here to view. You are fully flexible on how you set this up. Experiment, learn and improve your custom alerts setup!
This is it from my side. I hope this article helps you to get started or improve your Google Analytics custom alerts setup!
One last thing... Make sure to get my extensive checklist for your Google Analytics setup. It contains 50+ crucial things to take into account when setting up Google Analytics.Download My Google Analytics Setup Cheat Sheet
The post How to Leverage the True Power of Custom Alerts in Google Analytics appeared first on Online Metrics.